Ottomans are a fun embellishment in any room, as the photo above shows. You can make your own upholstered ottoman; all you need is the right fabric and colors for your space. They’re shockingly easy to make. You need a base, some foam, a staple gun, adhesive, some batting, and the fabric itself. Learn how to redo an ottoman below.
Step 1: Start With a Small Table
That’s right, a table. It’s a popular ottoman hack. A small table serves as the perfect base for an ottoman. You can either buy one, reuse one you have or make one by screwing some table legs to a piece of plywood.
Step 2: Gather Your Foam
You’ll need some thick foam that’s at least two inches high. Measure the foam so it covers the top of the table and cut.
You can also measure and cut foam strips for the side of the table. This is an optional step if you want extra padding on the sides.
Step 3: Spray the Table
Use a spray adhesive to secure the foam to the table. Spray the adhesive evenly over the top of the table. Wear safety goggles during this part and use the adhesive outside or in a garage where it won’t get on any other furniture.
Step 4: Flip the Table
Now flip the table onto a large piece of polyester batting. Measure and cut the batting edges so you have enough to fold around the underside of the table. Staple the batting in place with a staple gun. If applicable, trim any excess batting.
Now flip the table over so it’s facing right side up. You’ll have to position your fabric how you want it, especially if it has a specific pattern. Use temporary fabric tacks to keep the fabric in place. Make sure you have an extra few inches on the edges of the fabric to fold over the sides of the table. Then, carefully upend the table again.
Step 5: Fold the Fabric
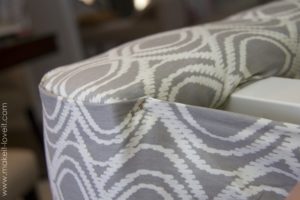
Fold the fabric over the ottoman and its base—staple in place. Make sure to fold straight seams and trim away any excess fabric. This is what the underside seams should look like as you’re folding, from Make It and Love It:
Step 6: Add Embellishments
Now, you can add optional embellishments, like lining the edges or sides of the ottoman with decorative nailheads or sewing buttons onto the top. You can add other funky embellishments, such as upcycled patches.


