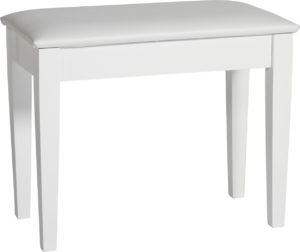
You don’t have to keep upholstered piano benches that are damaged, worn, or covered in ugly fabric.
Revamp your bench by reupholstering it — the older fabric will serve as a template or cheat sheet, making it simple to discover the exact shape and size of the fabric required to finish your project. For the best results, stick to an upholstery-grade fabric, or your seat might quickly wear out, and you will need to reupholster it again.
Items You Will Need
- Staple gun with staples
- Batting
- Scissors
- Pencil
- Upholstery fabric
- Flat-head screwdriver
- Staple remover
- Philips screwdriver
Instructions
- Open your piano bench so that you can reveal its hinges. Take off the lid by removing any screws on the part of each hinge that attaches to the base of your bench and not the seat. If your bench doesn’t open, you can skip this step.
- Turn the seat, or the whole bench if the seat is attached permanently, upside down. Pull the staples out of your upholstery fabric with a staple remover. If any staples are hard to remove, you can use the tip of the flat-head screwdriver to get them out. Leave the foam in place to reuse it; it ought to be attached to your seat.
- Spread new fabric face-down on top of a clean floor or work surface. Set the old fabric on top of it to use as your template. Draw an outline of the older fabric onto the back part of the newer piece using your pencil, then cut the new fabric out using scissors along your pencil lines.
- Spread batting on your work surface, then set the fresh-cut fabric on top. Trim around your material to cut the batting to size.
- Smooth new material, with the batting atop it, over your work surface to get the wrinkles out and keep the fabric evenly lined up with each other. Set your bench top–or bench, if its top is attached – face-down on top of the batting.
- Press down on your bench top as you grab the fabric and batting together on the long side of it. Wrap your batting and fabric around the underside of your benchtop, then staple it into place. Use a single staple every couple of inches. Repeat this process with the opposite part of the bench, and pull the fabric tightly prior to stapling there are no wrinkles.
- Wrap and staple one of the shorter sides, and again pull the fabric taut. Repeat this process on the other side.
- Tuck and then fold the edges. Secure the edges using several additional staples, and keep the fabric tidy, as if you are wrapping a present. Cut excess fabric close to the edges, if needed, using your scissors.
- Re-attach its lid to the remainder of your bench by lining up the hinged holes with those on the base. Replace screws and then tighten screws using your screwdriver. You can skip this step if your bench and bench top are connected permanently.


